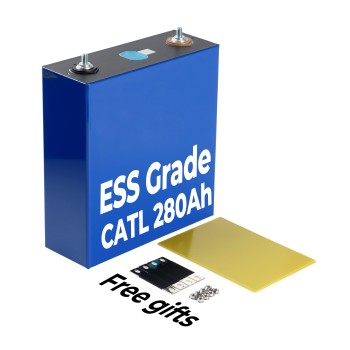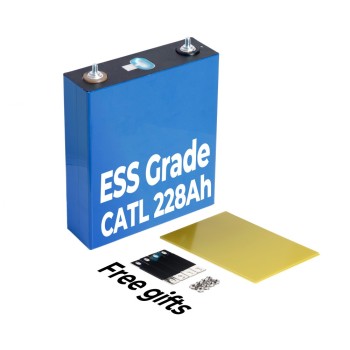
Hey everyone! I’ve been digging into the chatter across DIY forums and social media lately, and find that many people are buzzing about lithium battery pack DIY projects. I keep seeing questions pop up: “How do I start a DIY LiFePO4 battery?” “What’s the trick to a solid DIY LiFePO4 battery box?” You’re wrestling with cell testing, BMS woes, and whether it’s worth the hassle. Well, I’ve been there, and I’m here to share a detailed guide that answers those burning questions.
1. What Is a Lithium Battery Pack?
Simply put, it’s a group of lithium cells wired together—either in series or parallel—to create a single power unit. They’re everywhere: home solar setups, electric bikes, even off-grid camping rigs.
2. Why Choose to DIY Lithium Battery Pack?
I’ve been lurking in your discussions, and it’s fascinating to see what’s driving you toward DIY LiFePO4 battery builds:
- Saving Cash: Loads of you are griping about pre-made pack prices and reckon you can do it cheaper.
- Tailoring to Your Needs: Whether it’s a tiny pack for a camping lantern or a beefy system for solar backup, you’re all about customizing it to fit your exact setup.
- The DIY Bug: I see so many of you geeking out over the process—learning how batteries work and flexing those hands-on skills.
- The Risk Factor: Some of you are hesitant, mentioning safety hiccups or the time it takes, and that’s totally valid—I’ll cover those concerns later.
Your ideas are sparking this guide—let’s make it happen!
3. How to DIY a Lithium Battery Pack (Using LiFePO4)
Time for the nitty-gritty—building your DIY LiFePO4 battery.
3.1 Essential Materials and Tools
Picking the right components is where a lot of you hit snags, so here’s what to look for—and why it matters.
Batteries
When DIY assembling lithium batteries, there are several things to pay attention to:
- Type: LiFePO4 cells (3.2V, prismatic or cylindrical). They’re stable and long-lived—safer than NCM for newbies.
- Grade:Regarding the battery level, I have compiled a table for you to use as a reference for comparison:
Feature EV/ES Grade A EV/ES Grade A- EV/ES ESS Grade B Grade C / Used / Recycled Application EV, industrial power Solar, ESS, off-grid Less demanding EV use/General ESS, cost-effective Low-power EVs/Low-cost storage Not recommended Discharge rate High/Steady output Moderate-High/Stable, slightly lower Lower Unstable Cycle life Longest Good but slightly lower Shorter Very low Internal Resistance Lowest Slightly higher Moderate High Cost Highest More affordable Lower Cheapest New Cell Yes, brand new Yes, brand new Yes, Unused No, USED Original manufacture Test report PDF file Yes Yes No No Intact QR Code Yes Yes No No - Battery Parameters: Hunt for cells with tightly matched specs—capacity (aim for <5% variance, like 95Ah-100Ah in a 100Ah pack), internal resistance (Δ<1mΩ), and even self-discharge rate (test over 72 hours). Mismatched cells age unevenly—I’ve seen packs lose 20% capacity in months because one ‘lazy’ cell dragged the rest down. If salvaging used cells, check their cycle history—a 200-cycle cell paired with a 50-cycle one is a ticking time bomb.
- Safety Certifications: UL or CE labels matter. I’ve seen sketchy cells overheat or fail—certified ones dodge that drama.

BMS (Battery Management System)
- Purpose: This little board keeps your pack from overcharging, over-discharging, or shorting out. Without it, you’re risking fried cells—or worse.
- Types: Active balancing is more efficient for packs >100Ah but requires precise voltage sensing. Passive balancing may need manual intervention if cell divergence exceeds 50mV. Unbalanced packs lose efficiency—one cell at 4V, others at 3V.
- Top Balance: Charge all cells to 3.65V before use. Solar builders love this for consistency—skip it, and your pack might underperform.
- Bottom Balance: Discharge to the same low voltage instead. Rare, but some low-power gadget builders prefer it. I’ve seen it mess up high-drain setups, though—stick to top balancing unless you’re niche.

Battery Box (DIY LiFePO4 Battery Box)
- Materials: High-temp plastic, aluminum, or 3D-printed cases. Plastic’s light, metal’s tough—choose based on your vibe.
- Design Needs: Ventilation prevents heat buildup (overheating cuts lifespan); waterproofing stops corrosion; shock resistance saves cells from drops. I’ve seen flimsy boxes melt or crack—don’t skimp here.

Inverter
- Purpose: DC to AC for appliances. Only needed for AC loads—DC setups skip it.
- Is It Necessary?: Only for AC needs—home backup folks need it, EV builders don’t. Mismatching watts (e.g., 500W inverter on a 1000W load) fries it fast.
- Selection: Match your pack’s output (e.g., 1000W for 12V 100Ah).
Tools and Accessories
- Tools: Multimeter (to check volts), soldering iron (for connections), screwdriver (for assembly). No multimeter? You’re flying blind—seen too many “dead pack” posts from skipped testing.
- Accessories: Nickel strips (for welding), heat shrink tubing (insulation), terminal connectors, wires. Cheap wires overheat—use proper gauge or regret it.

3.2 Step-by-Step DIY Process
Here’s the detailed build you’ve been asking for—let’s roll!
Plan Your Needs
Calculate voltage (e.g., 4 cells in series = 12.8V) and capacity (e.g., 100Ah cells in parallel = 100Ah). Sketch your setup—solar? Camping? It sets the scope. Then pick matching LiFePO4 cells from a solid vendor.
Test Cells
Hook each cell to a tester. Check:
- Capacity: Charge to 3.65V, discharge to 2.5V, note Ah. Perfect matches are rare—aim for a 2–5% variance (e.g., 98–102Ah for 100Ah cells, per industry standards). Wider gaps (10%+) unbalance your pack.
- Internal Resistance: Use a meter (aim for <1 mΩ difference). High resistance means heat and loss—seen packs fail from this.
- Voltage: Resting voltage should be close (e.g., 3.2–3.3V). Outliers die fast—toss them.
Connect Batteries
Series: Stack cells (+ to -) for higher voltage (e.g., 4S = 12.8V).
Parallel: Link all positives and negatives for more capacity (e.g., 4P = 400Ah).
Spot weld nickel strips (soldering’s riskier—overheating damages cells). Check polarity with a multimeter—reverse it, and sparks fly.Install BMS
Pick a BMS for your setup (e.g., 4S 100A for 12V 100Ah). Wire B- to battery negative, P- to load—follow the diagram. Test: charge to 14.6V, see if it cuts off; discharge, check low-voltage protection. Wrong hookup? No protection, dead pack.
Build the Battery Box
Arrange cells snugly in your DIY LiFePO4 battery box. Drill vent holes (heat kills cells), add padding (vibration cracks them), and seal edges (moisture’s a killer). Test fit—loose cells shift and short.
Fire Safety:- Line the battery box with fire-resistant materials (e.g., ceramic fiber blanket).
- Keep a Class D fire extinguisher nearby for lithium battery fires.
- Never solder directly to cells—use spot welding to avoid heat damage (>150°C degrades LiFePO4).
Add Inverter (If Needed)
Connect to BMS output (positive to positive, negative to negative). Test with a small load (e.g., 60W bulb)—confirm it runs. Overload it (e.g., 1000W on a 500W inverter), and it’s toast—scale up slowly.
Test the System
Measure pack voltage (e.g., 12.8V for 4S). Charge fully (14.6V), discharge with a load (e.g., 100W), monitor temps (over 50°C spells trouble). Check each cell’s voltage—big gaps mean bad connections. Tweak and retest—rushing kills packs.
4. Key Precautions for a Safe DIY Battery Pack
Your safety posts are gold—here’s what I’ve compiled:
- Connections: Tighten terminals—loose ones spark or drop power.
- BMS Matching: Wrong specs (e.g., 50A BMS on 100A load) fail to protect.
- Temperature: 0–45°C is safe—overheating ages cells, cold cuts capacity.
- Maintenance: Monthly voltage checks, clean terminals—dusty contacts overheat.
- Safety: Fireproof storage, good insulation, no short-circuit shortcuts.
Of course, if you still think buying a pre-assembled battery pack is better, feel free to check out our battery pack product page. Pre-assembled packs save time (no assembly headaches), come pro-tested (stable and safe), and offer warranties (beats troubleshooting solo).

5. Wrap-Up: Lessons from the DIY Trenches
After watching your trials and triumphs, I can say lithium battery pack DIY projects—like nailing a DIY LiFePO4 battery box—are equal parts challenge and reward. Test every step, keep safety first, and you’ll end up with a DIY LiFePO4 battery that’s all yours. Start small, learn as you go, and share your wins (or woes) below—I’m here for it!
Frequently Asked Questions
What Happens If I Skip the BMS?
Overcharging fries cells, over-discharging kills them, shorts spark fires. I’ve seen packs ruined in days—don’t skip it.
Can I Expand a DIY LiFePO4 Battery Pack?
Yes, if new cells match (capacity, voltage) and you rebalance. Mismatched expansions? Uneven wear tanks the pack.
Can Different Brands of LiFePO4 Batteries Be Used Together?
Not ideal—slight differences in resistance or capacity mess up charging. Possible if:
- Capacity variance <5%, IR variance <10%.
- Same chemistry (e.g., don't mix LiFePO4 with LFMP).
- Full top-balancing is performed before assembly."
Can LiFePO4 Mix with NCM/NCA Batteries?
Nope—different voltage curves and chemistries wreck the system. Keep it pure LiFePO4.


1 Comment(s)
This is a really helpful guide! It breaks down the process of making a lithium battery pack into simple steps. The tips about safety are super important, and I like how you explain things without using complicated words. It makes the idea of DIYing a battery seem less scary and more doable. Thanks for sharing your knowledge in such an easy-to-understand way!
Leave a Comment