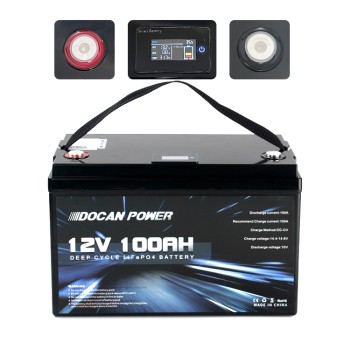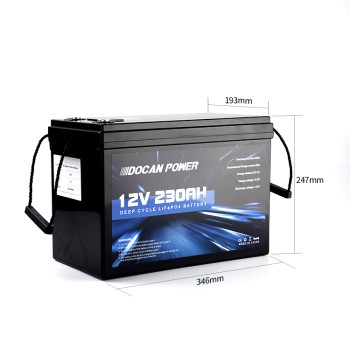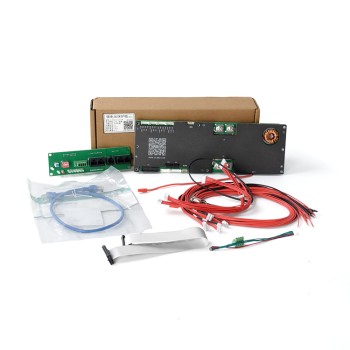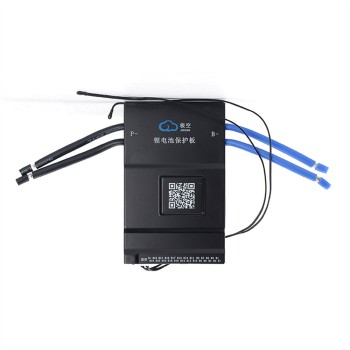
Connecting an inverter to a battery bank is the backbone of a reliable solar energy storage system. For DIY enthusiasts using LiFePO4 batteries, proper connections ensure efficiency, safety, and long-lasting performance. Mistakes, however, can lead to reduced output, equipment damage, or safety risks. This guide covers the essentials of inverter-battery connections, highlights five common errors DIY users make, and provides practical solutions to avoid them. For insights into how batteries empower solar storage, explore our in-depth article.
Understanding Inverter and Battery Connections
An inverter converts direct current (DC) from a battery bank (typically 12V, 24V, or 48V) into alternating current (AC) for household appliances. LiFePO4 batteries, known for their safety and longevity, are a top choice for solar storage. Key components include:
- Cables: High-current DC cables (pure copper, AWG-rated).
- Battery Management System (BMS): Monitors voltage, current, and temperature.
- Fuse or Circuit Breaker: Protects against short circuits.
- Communication Protocols: CAN or RS485 for BMS-inverter synchronization.
Proper setup maximizes inverter efficiency (typically 90-95%) and prevents issues like voltage drops or overheating.
Five Common DIY Mistakes and How to Fix Them
1. Using Undersized Cables
Problem: Choosing cables that are too thin, like AWG 10 for a 100A load, causes voltage drops and heat buildup. A 2V drop in a 48V system reduces efficiency by ~4%.
Consequence: Lower efficiency, overheating, and potential fire hazards.
Solution: Select cables based on current and length. For a 48V system with a 100A load, use AWG 4 or AWG 2 pure copper cables (resistivity ρ = 1.68×10⁻⁸ Ω·m). Calculate resistance with R = ρL/A to keep voltage drop below 2%.
Pro Tip: Use an infrared thermometer to ensure cable temperatures stay below 60°C.
2. BMS-Inverter Communication Failure
Problem: Mismatched protocols (e.g., CAN vs. RS485) between the BMS and inverter can disrupt communication, leading to charging errors.
Consequence: Improper regulation risks overcharge or deep discharge, shortening LiFePO4 lifespan by 20-30%.
Solution: Verify the inverter’s supported protocols in its manual and ensure the BMS matches (e.g., RS485). Update BMS firmware or use a protocol converter if needed. Our BMS products support multiple protocols for seamless integration.
Pro Tip: Use a multimeter to check signal integrity during setup.

3. Skipping Fuses or Circuit Breakers
Problem: Connecting the battery directly to the inverter without a fuse or DC circuit breaker is risky. A short circuit in a 48V 100Ah system can exceed 1000A.
Consequence: Fire or equipment damage.
Solution: Install a T-class fuse or DC circuit breaker rated at 1.25x the maximum load (e.g., 200A for a 160A peak system), placed within 7 inches of the battery’s positive terminal.
Pro Tip: Choose a fuse holder with a clear cover for easy inspection.
4. Mismatched Battery and Inverter Voltage
Problem: Pairing a 12V battery bank with a 48V inverter (or vice versa) is a common error, especially when scaling systems.
Consequence: The inverter fails to start, or components may burn out.
Solution: Match the battery bank’s nominal voltage to the inverter’s input. For a 48V system, use 16 LiFePO4 cells (3.2V each) in series. Verify cell voltages with a multimeter (tolerance <0.05V). Need help building your pack? Read our guide on how to DIY a lithium battery pack.
Pro Tip: Label the battery bank’s voltage to avoid confusion during upgrades.
5. Ignoring Loose or Overheated Connections
Problem: Loose bolts or poorly crimped terminals increase resistance, generating heat. A 0.1Ω resistance increase at 100A produces 10W of heat.
Consequence: Efficiency loss and risk of melted connectors.
Solution: Tighten connections with a torque wrench (5-7 Nm, per manufacturer specs). Use a hydraulic crimping tool for cable lugs. Monitor with an infrared thermometer (hotspots >70°C signal issues).
Pro Tip: Apply dielectric grease to terminals to prevent corrosion in humid conditions.
Step-by-Step Guide to Proper Connection
- Calculate Load and Select Cables: For a 48V 100Ah system (e.g., using 314Ah cells), choose AWG 4 cables for runs under 10ft. Use online voltage drop calculators for precision.
- Configure BMS: Set the BMS to match the inverter’s protocol (e.g., RS485 for MPPT controllers). Program parameters like overvoltage (3.65V/cell) and undervoltage (2.5V/cell).
- Assemble Battery Bank: Connect cells in series (e.g., 16S for 48V). Confirm voltage consistency with a multimeter.
- Install Protection: Add a 200A T-class fuse or DC breaker near the battery. Include an isolator switch for maintenance.
- Test the System: Measure voltage at the inverter terminals (should match battery voltage ±0.5V). Check cable temperatures after 30 minutes of operation.
Recommended Tools:
- Multimeter
- Infrared Thermometer
- Hydraulic Crimping Tool
Real-World Case Studies
Case 1: A DIY user with a 48V 100Ah system used AWG 8 cables, causing a 2.5V drop and 80% inverter efficiency. Switching to AWG 2 cables reduced the drop to 0.5V, boosting efficiency to 95%.
Case 2: A user faced charging issues due to a BMS protocol mismatch. Switching to RS485 and updating firmware fixed the problem, preventing overcharging and extending battery life. For a similar success story, see how we supported a Yemeni customer with his inverter setup.
Safety Tips and Maintenance
Safety:
- Disconnect power before wiring to avoid arcs.
- Wear insulated gloves and use insulated tools.
- Ensure proper ventilation to prevent battery overheating.
Maintenance:
- Inspect connections every 3 months and tighten bolts if needed.
- Monitor cable temperatures every 6 months (<60°C is ideal).
- Update BMS firmware annually for optimal performance.
Conclusion
Properly connecting a solar inverter to a LiFePO4 battery bank is crucial for an efficient, safe, and durable solar storage system. By avoiding common mistakes—undersized cables, communication errors, missing fuses, voltage mismatches, and loose connections—DIY users can optimize their setups. Ready to build or troubleshoot your system? Double-check your connections and explore our LiFePO4 battery packs to power your solar journey.
FAQ
What cable size should I use for a 48V 100A system?
AWG 4 or AWG 2 pure copper cables for runs under 10ft to keep voltage drop <2%.
Why does my inverter show a communication error?
Likely a BMS protocol mismatch (e.g., CAN vs. RS485). Check the inverter manual and update BMS firmware.
Is a fuse necessary for small systems?
Yes, a T-class fuse (e.g., 200A) prevents catastrophic short circuits, regardless of system size.


Leave a Comment