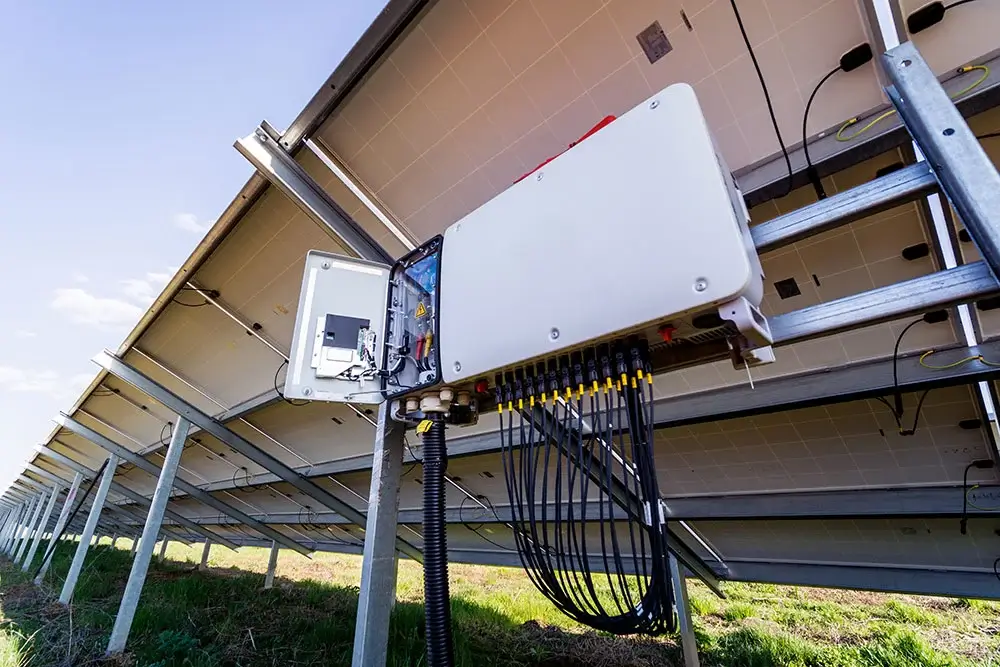
Solar storage systems empower homes with clean energy, but DIY users often encounter compatibility issues that lead to inefficiencies or system failures. Selecting the right solar storage battery is critical, but how do you ensure it integrates seamlessly with your photovoltaic (PV) system, including the inverter, solar panels, and MPPT controller? This article explores six common mistakes DIY users make and provides practical solutions to build an efficient, reliable solar system.
Mistake 1: Ignoring AC-Coupled vs. DC-Coupled Systems
Problem
Many DIY users overlook the differences between AC-coupled and DC-coupled systems, leading to suboptimal system architecture. AC-coupled systems convert solar energy to AC multiple times before storage, resulting in lower efficiency (85-90%). DC-coupled systems store DC power directly in the battery, achieving higher efficiency (up to 97.5%).
Consequences
Choosing the wrong coupling method can cause energy losses or installation complexity. For instance, AC-coupled systems are less efficient in off-grid scenarios, while DC-coupled systems may not suit upgrades to existing grid-tied setups.
Solution
Select the coupling method based on your needs. Here’s a comparison:
| Feature | AC-Coupled | DC-Coupled |
|---|---|---|
| Power Path | Panels DC → Inverter (DC to AC) → Battery (AC to DC) | Panels DC → Charge Controller → Battery |
| Inversions | 3 | 1 |
| Efficiency | 85-90% | Up to 97.5% |
| Best For | Existing system upgrades, grid-tied | Off-grid or new systems |
| Installation | Simpler | More complex |
Quick Tip: Opt for DC-coupled systems for new home installations to maximize efficiency; choose AC-coupled for easier upgrades to grid-tied systems.
Mistake 2: Mismatched Battery Voltage and Inverter
Problem
DIY users often pair batteries with incompatible voltage ratings, such as using a 12V or 24V battery with a 48V inverter. For home solar systems, 48V is the standard, as it supports higher power output and reduces current losses.
Consequences
Voltage mismatches can prevent the inverter from starting or even damage equipment. For example, a 24V battery cannot supply sufficient voltage for a 48V inverter, causing system failure.
Solution
Ensure the battery’s nominal voltage matches the inverter’s input voltage. For instance, use 16 LiFePO4 cells (3.2V each) in series to create a 48V battery pack (16 x 3.2V = 51.2V). Before purchasing, check the inverter’s specification sheet for supported voltage ranges (e.g., 48V ±10%). For more on inverter connections, see Inverter Connection Mistakes.
Quick Tip: Verify battery voltage from the specification sheet (e.g., LiFePO4 cells are 3.2V; 16 in series yield 48V).

Mistake 3: Incorrect MPPT Controller Settings
Problem
Maximum Power Point Tracking (MPPT) controllers optimize solar panel charging efficiency, but many users fail to configure parameters like charging voltage, current, or maximum input voltage, leading to overcharging or undercharging.
Consequences
Incorrect settings can shorten battery lifespan or reduce system efficiency. For example, setting an excessively high charging current may overheat LiFePO4 batteries.
Solution
Follow these steps to configure your MPPT controller:
- Verify Battery Specs: Check the battery’s nominal voltage (e.g., 48V) and maximum charging current (e.g., for a 100Ah battery, max current is 0.5C, or 50A).
- Assess Solar Array: Calculate the solar panels’ maximum power output and open-circuit voltage (Voc, e.g., 5kW array with ~200V Voc).
- Set Parameters: Refer to the manufacturer’s manual to set charging voltage (e.g., 3.6V/cell for LiFePO4, 57.6V for 16S) and current limit.
- Test Operation: Use a multimeter to verify actual charging voltage and current, ensuring they stay within safe ranges.
Opt for MPPT controllers with auto-detection features, such as Victron Energy models. Proper settings are vital for battery longevity; learn more in LiFePO4 Battery Maintenance.
Quick Tip: Choose an MPPT controller with auto-detection to simplify setup.
Example: For a 48V LiFePO4 battery (51.2V, 100Ah) and a 200V solar array, set the MPPT controller to 57.6V charging voltage and 50A current limit.
Mistake 4: Neglecting Future Expansion Needs
Problem
Many users fail to plan for future expansion, such as adding battery capacity or solar panels, making upgrades challenging.
Consequences
Non-expandable components may require full replacement, increasing costs. For example, a single battery pack without parallel support cannot accommodate additional capacity.
Solution
Choose expandable components:
- Batteries: Select LiFePO4 batteries with parallel-capable BMS for multiple pack connections.
- Inverters: Opt for inverters with multiple MPPT inputs or expansion ports, such as Growatt or SMA models.
- MPPT Controllers: Ensure controllers support higher input voltage and current for additional panels.
Quick Tip: Select BMS with parallel support and inverters with multiple MPPT inputs for future expansion.
Mistake 5: Overlooking System Efficiency Losses
Problem
DIY users often ignore efficiency losses from inverters, charge controllers, and wiring, resulting in systems undersized for actual needs.
Consequences
Systems without efficiency loss considerations may fail to deliver sufficient power, causing frequent outages or reliance on the grid.
Solution
Apply a 1.5x multiplier to daily energy consumption to account for losses. For example, a household using 1200Wh daily requires a system designed for 1800Wh (1200 x 1.5). Ensure battery capacity and solar panel output meet 2-5 days of autonomy.
Quick Tip: Multiply daily energy consumption by 1.5 to account for efficiency losses when sizing your system.
Mistake 6: Failing to Systematically Check Compatibility
Problem
DIY users often neglect overall system compatibility, causing one component’s mismatch to trigger a cascade of failures, akin to a “domino effect.”
Consequences
A single incompatible component can disable the entire system. For example, solar panel voltage exceeding the MPPT controller’s input range can damage the controller.
Solution: Domino Effect Checklist
Use this checklist to verify system compatibility step-by-step:
- Solar Panels to MPPT Controller: Ensure the panels’ open-circuit voltage (Voc) and short-circuit current (Isc) are within the controller’s input range (e.g., Voc 150V < controller 200V).
- MPPT Controller to Battery: Confirm the controller’s output voltage and current match the battery’s charging requirements (e.g., 57.6V for a 48V LiFePO4 battery).
- Battery to Inverter: Verify the battery voltage aligns with the inverter’s input voltage and check communication protocol compatibility (e.g., CAN or RS485).
- Inverter to Load/Grid: Ensure the inverter’s power output meets load demands and complies with grid standards (e.g., UL1741 certification). For grid connection tips, see Grid Connection Challenges.
Compatibility Checklist:
| Step | Check | Example |
|---|---|---|
| Panels → MPPT Controller | Voc < Controller Max Input Voltage | Voc 150V < Controller 200V |
| MPPT Controller → Battery | Charging Voltage = Battery Nominal | 51.2V (16S LiFePO4) |
| Battery → Inverter | Battery Voltage = Inverter Input Voltage | 48V Battery = 48V Inverter |
| Inverter → Load/Grid | Power Output ≥ Load Demand | 5kW Inverter ≥ 4kW Load |
Quick Tip: Print this checklist and verify each component before purchase.
Conclusion
By avoiding these six common mistakes, DIY users can build efficient, reliable solar storage systems. Use the domino effect checklist to ensure seamless component integration, boosting system performance and longevity. Start checking your system today to create a sustainable energy future!


Leave a Comment